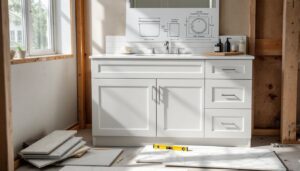
A 60-inch bathroom vanity strikes the sweet spot for most homeowners, large enough to offer genuine storage and countertop workspace, yet not so oversized that it dominates a typical master or guest bath. Whether you’re renovating a dated bathroom or planning a complete overhaul, choosing the right 60″ vanity means weighing cabinet construction, countertop materials, sink configuration, and your own installation comfort level. This guide walks you through what matters most so you can pick a vanity that looks right, functions well, and lasts.
Table of Contents
ToggleKey Takeaways
- A 60-inch bathroom vanity provides the ideal balance of storage and countertop workspace while remaining practical for most master and guest bathrooms without overwhelming the room layout.
- Choose durable materials like plywood or thermofoil for better moisture resistance in humid bathroom environments, as solid wood requires careful ventilation and engineered materials like MDF are more budget-friendly but need protection from direct water contact.
- Quartz countertops offer the best combination of durability and low maintenance, while granite adds visual appeal and resale value, though natural stone requires professional sealing every 1–3 years.
- Dual sink setups maximize functionality for shared bathrooms and couples but increase plumbing complexity, while single sinks work well for guest baths and provide extra countertop space for less installation cost.
- Mount your 60-inch vanity to wall studs using a stud finder at 16-inch intervals to ensure stability, and plan for professional plumbing help ($300–$600) if you’re relocating drain and supply lines to avoid costly leaks.
- Budget $400–$1,500 for the cabinet itself, then invest in features like full-extension soft-close drawers and internal organizers that improve daily usability and prevent clutter in your bathroom.
Why Choose a 60-Inch Bathroom Vanity?
A 60-inch vanity (measured wall-to-wall, not just the sink width) offers a practical balance most DIYers and homeowners appreciate. It provides ample countertop real estate for toothbrushes, soap dispensers, and grooming tools without forcing you into a sprawling layout that eats up floor space. Two people can comfortably use it simultaneously, which matters in shared bathrooms.
Storage-wise, a 60″ cabinet typically includes two full-height cabinet sections with drawers and shelving. That’s significantly more than a 36″ or 48″ unit. You’ll have room for cleaning supplies, medications, extra towels, and hair care products without resorting to over-the-toilet shelving or wall-mounted organizers, though those aren’t bad backup options.
From a cost perspective, a 60-inch vanity hits a reasonable middle ground. It’s pricier than a 36″ basic unit but less expensive per-square-inch than custom cabinetry. Most standard 60″ vanities (ready-to-assemble or pre-assembled) run $400–$1,500 before countertop and installation, depending on materials and finish quality.
Cabinet Styles and Materials to Consider
Your cabinet choice affects durability, appearance, maintenance, and budget. Don’t overlook this decision: a poorly chosen vanity cabinet will show wear within a few years, especially in the humid bathroom environment.
Wood vs. Engineered Materials
Solid wood (oak, maple, cherry, walnut) looks premium and can be refinished or repainted, but it requires careful moisture management. Bathrooms are damp spaces, improper ventilation or repeated water splashing will cause wood to swell, warp, or rot. Solid wood vanities need a quality exhaust fan, good ventilation habits, and sealed finishes (lacquer, polyurethane). They’re most forgiving in well-ventilated bathrooms and higher-end renovations.
Engineered materials like plywood and medium-density fiberboard (MDF) with veneer or paint finishes dominate the mid-range market. Plywood is more moisture-resistant than solid wood and holds up better to daily humidity. MDF with a painted finish is budget-friendly and looks clean, but it’s the least water-resistant of the three: direct water contact causes swelling. If you choose MDF, ensure your countertop overhangs the cabinet front by at least 1 inch and consider a toe-kick kickboard to minimize splash exposure.
Thermofoil (vinyl-wrapped MDF) offers durability and easy cleaning at a reasonable price point. It resists moisture better than bare MDF and comes in numerous colors and finishes. It’s not repairable if damaged, but replacement is straightforward.
Budget-conscious DIYers often pair an engineered cabinet with a premium countertop to balance cost and visual impact. A $600 plywood vanity with a $400 quartz countertop often looks more cohesive and lasts longer than a $800 solid-wood cabinet with a basic laminate top.
Countertop Options and Sink Configurations
Your countertop is the first thing you touch and see every day. It’s worth getting right because replacement is labor-intensive and costly.
Quartz is engineered stone, crushed quartz blended with resin. It’s non-porous, stain-resistant, heat-resistant, and requires minimal maintenance (just soap and water). Quartz doesn’t need sealing like granite or marble. Budget $800–$2,000 for a fabricated and installed 60″ quartz top.
Granite and marble are natural stone, visually stunning, and add resale value. Granite is durable: marble is softer and more porous, staining easily with acidic products (vinegar, citrus, wine). Both require professional sealing and resealing every 1–3 years. If you choose marble, accept that patina and etching are part of the charm, or commit to a rigorous maintenance routine.
Laminate is budget-friendly ($300–$600 installed) and comes in countless patterns. It’s not waterproof: moisture seeps into edges and seams, causing swelling and delamination. Use laminate only if you’re planning a quick, cosmetic update or have a secondary bathroom with minimal use.
Solid surface (Corian, Wilsonart) feels luxurious, is non-porous, and can be repaired by sanding. It’s softer than quartz and shows scratches more easily, but the trade-off is repairability. Cost runs $800–$1,500 installed.
Paired vs. Single Sink Setups
Dual sinks (two 18″–22″ basins side-by-side) are the standard for 60″ vanities. They’re perfect for couples, reduce morning congestion, and look intentional in master baths. Each sink needs its own P-trap and supply lines, which adds plumbing complexity and cost during installation.
Single large sink (40″–48″ wide) is practical for guest baths, kids’ rooms, or any space where two people won’t routinely use it simultaneously. A single sink uses less plumbing, is easier to install, and leaves extra countertop for décor or storage baskets. Undermount or vessel sinks read more upscale: drop-in is the most common and least expensive.
Storage and Functionality Features
Storage differentiates a basic vanity from one you’ll actually love using. Before buying, think about what you store in your bathroom.
Full-extension drawers with soft-close hinges are a game-changer. They glide smoothly under load (no jamming halfway) and don’t slam shut, important in a household with kids. They cost $40–$80 more per drawer than standard slides, but durability and usability are worth it.
Dividers and organizers inside drawers (toothbrush holders, makeup trays, utensil-style organizers) prevent clutter and make items easy to find. Some vanities include these: others require aftermarket inserts.
Open shelving (a shelf beneath the countertop or exposed area) adds visual lightness and quick access to frequently used items like towels or soap. But, open areas collect dust and show clutter. Reserve them for baskets or items you don’t mind displaying.
Toe-kick height affects comfort. Standard is 4–4.5 inches, but if you’re tall or have mobility concerns, a higher toe-kick or open design (no cabinet panel at floor level) can reduce strain. Measure your current vanity or squat in front of a few showroom models to find what feels right.
Backing (the panel between the countertop and wall) comes in three types: solid (traditional, hides plumbing), open (modern look, requires wall finish), or mirror-backed (adds light and reflection). Consider your wall condition, if tile or wallpaper needs updating, an open-back vanity forces a renovation. A solid back simplifies installation.
Installation and DIY Considerations
A 60-inch vanity is heavy (often 150–250 pounds empty, more with countertop and sink). You’ll need at least one helper, a level, a screwdriver set, and a drill. Have your water supply shut-off valve accessible before you start, you’ll need it.
Check your wall first. Locate studs using a stud finder and mark them at 16-inch intervals. Vanities mount to wall studs with lag bolts or cabinet screws: attaching to drywall alone invites sagging and failure. Most building codes (IRC) require cabinet mounting every 16 inches horizontally. If studs don’t align with pre-drilled holes on your vanity, you’ll need to relocate mounting holes, feasible if the cabinet is plywood or solid wood, not if it’s thin MDF.
Measure the rough opening. Vanity depth is typically 18–24 inches (front-to-back). Measure from the wall to any obstacles (toilet, door swing, shelving). If your bathroom has a sloped ceiling, check clearance above the vanity as well. Standard countertop height is 32–36 inches (surface to floor): ADA-compliant vanities are 34 inches.
Plan plumbing. If you’re upgrading from a smaller vanity to a 60-inch model, your new sink drains and supplies likely won’t align with existing holes. You may need to move or cap old supply lines and drain pipes, which requires soldering copper or working with PEX tubing, tasks many DIYers can handle, but plumbing mistakes cause leaks. If you’re uncertain, hire a licensed plumber for the drain and supply rough-in: you can install the vanity itself. Budget $300–$600 for professional plumbing help.
Countertop fastening. Factory-installed vanities often come with the countertop preattached. If you’re sourcing a separate top, it mounts with silicone adhesive and/or brackets underneath. Never use screws from below into the countertop: they’ll loosen and cause cracking.
Research bathroom remodeling case studies on Remodelista’s design gallery to see how professionals handle 60-inch vanities in real homes. For general installation guidance and tool reviews, Bob Vila’s home improvement resource covers vanity installation step-by-step.
Safety and permits. If you’re relocating plumbing, installing new electrical outlets (code requires GFCI outlets in bathrooms), or making structural changes, check local building codes, they vary by jurisdiction. Some municipalities require a permit for bathroom work: others don’t. A permit ensures an inspector verifies your work meets code and protects you if you ever sell. Call your local building department before starting.
Timeline and tools. Cabinet installation is a half-day job (2–3 hours with a helper). Plumbing rough-in takes 4–8 hours, depending on distance to supply and drain lines. Countertop installation is another 2–4 hours. Overall, expect a full weekend for a complete swap, or call professionals for plumbing and skip the DIY headache.
Essential tools: stud finder, level, drill, screwdriver set, adjustable wrench, bucket, shut-off valve key, caulk gun, and safety glasses. If you’re cutting or routing new plumbing holes, add a hole saw bit and drywall saw.
Making Your Final Choice
A 60-inch bathroom vanity is a centerpiece investment, it affects daily comfort, storage, and the overall feel of your bathroom. Start by measuring your space, confirming wall studs and plumbing locations, then choose your cabinet material based on bathroom ventilation and your maintenance tolerance. Pair it with a countertop that matches your lifestyle (low-maintenance quartz or granite for busy households: beautiful but higher-upkeep marble for those willing to care for it). Decide between dual or single sinks based on usage, then assess hardware and storage features that align with what you actually need to store. If plumbing or structural work feels outside your comfort zone, bring in a professional, it’s worth the investment to avoid costly mistakes. With the right vanity and a solid installation plan, you’ll have a functional, attractive focal point that serves your bathroom well for 10+ years.